Introduction to Web Development
Reviewed & published by Brayan K
HTML and CSS are the core building blocks of every website: HTML (HyperText Markup Language) defines the structure and content of a page, while CSS (Cascading Style Sheets) controls how that content looks.
Part of the free HTML & CSS course at LearnCodingFast — hands-on lessons with examples you run in your browser, plus practice exercises and a quick quiz.
Learn the fundamentals of how websites work and what technologies power the web.
What You'll Learn
- ✓ What web development is and how websites work
- ✓ The difference between HTML, CSS, and JavaScript
- ✓ How to create your first HTML file
- ✓ Basic HTML structure and common elements
- ✓ Your first CSS styling
- ✓ The CSS Box Model fundamentals
Good News: No Installation Required!
To write HTML and CSS, you only need two things you already have:
Notepad (Windows), TextEdit (Mac), or any code editor like VS Code
Chrome, Firefox, Safari, or Edge — any browser works!
You can also practice directly on this website using the "Try It Yourself" sections — no setup needed!
Create Your First HTML File (Step-by-Step)
1 Open a Text Editor
- Windows: Search for "Notepad" in Start menu
- macOS: Open TextEdit (set to Plain Text mode: Format → Make Plain Text)
- Better option: Download VS Code (free, works on all systems)
2 Type This Code
<!DOCTYPE html>
<html>
<head>
  <title>My First Website</title>
</head>
<body>
  <h1>Hello, World!</h1>
  <p>I just created my first webpage!</p>
</body>
</html>
3 Save the File
Save it as index.html (make sure it ends with .html, not .txt)
4 Open in Browser
Double-click your index.html file — it will open in your default browser!
You should see "Hello, World!" displayed in your browser!
Congratulations — you just created your first website!
| File Extension | What It Is | Opens With |
|---|---|---|
| .html | HTML document (structure) | Any web browser |
| .css | CSS stylesheet (styling) | Linked inside HTML |
| .js | JavaScript file (behavior) | Linked inside HTML |
1) What Is Web Development?
Web development is the process of creating websites and web applications that run in a browser (like Chrome, Safari, or Firefox). Every website you've ever visited — Google, YouTube, Amazon, Instagram — is built using web technologies.
At its core, web development is about three main things:
- Structure – what content exists on the page
- Style – how that content looks
- Behavior – how the page reacts to users
In this course, we focus on the first two:
- ✅ HTML → structure
- ✅ CSS → style
- 📝 JavaScript (behavior) comes later in a dedicated course
2) How the Web Actually Works
When you type a website address into your browser (for example: www.example.com), this happens:
- Your browser sends a request to a server
- The server responds with HTML, CSS, and sometimes JavaScript
- Your browser reads the HTML, applies the CSS, and runs any JavaScript
- The final page is displayed on your screen
Think of it like this:
- 🦴 HTML = the skeleton of a body
- 👗 CSS = the clothes, colors, and appearance
- 🧠 JavaScript = the muscles and brain
Without HTML, nothing exists. Without CSS, everything looks ugly.
3) What Is HTML?
HTML stands for HyperText Markup Language.
- ❌ HTML is not a programming language
- ❌ It does not do logic, math, or decision-making
- ✅ HTML's only job is to describe content
Examples of content HTML describes:
- • Paragraphs
HTML uses tags to describe elements.
4) Basic HTML Structure (Every Page Needs This)
Every HTML page follows the same basic structure. Try it yourself!
<!DOCTYPE html>
<html>
  <head>
    <title>My First Website</title>
  </head>
  <body>
    <h1>Hello World!</h1>
    <p>This is my first website.</p>
    <p>Try changing this text and click Run!</p>
  </body>
</html>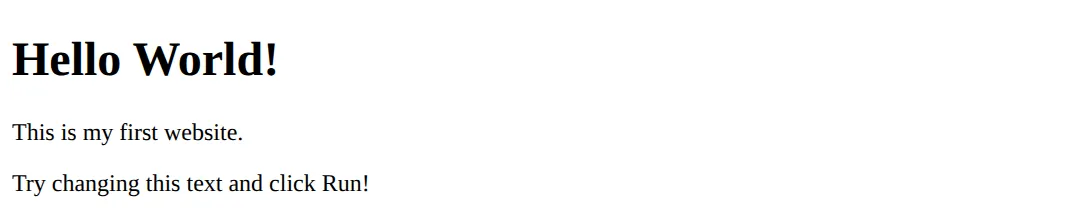
Tells the browser: "This is a modern HTML5 document."
Wraps the entire website. Everything must be inside this tag.
Contains information about the page (title, meta info, CSS links) — not visible content.
Where everything visible goes — text, images, buttons.
5) Common HTML Elements (You Will Use These A LOT)
<!DOCTYPE html>
<html>
<head>
  <title>HTML Elements</title>
</head>
<body>
  <!-- Headings - h1 is most important -->
  <h1>Main Heading</h1>
  <h2>Sub Heading</h2>
  <h3>Smaller Heading</h3>

  <!-- Paragraphs -->
  <p>This is a paragraph of text.</p>

  <!-- Links -->
  <p>Visit <a href="https://google.com">Google</a></p>

  <!-- Images -->
  <img src="https://via.placeholder.com/150" alt="Placeholder image">

  <!-- Lists -->
  <h3>My Favorite Fruits:</h3>
  <ul>
    <li>Apple</li>
    <li>Banana</li>
    <li>Orange</li>
  </ul>

  <h3>Steps to Learn HTML:</h3>
  <ol>
    <li>Read the lesson</li>
    <li>Try the examples</li>
    <li>Practice daily</li>
  </ol>
</body>
</html>- <h1> to <h6> - Headings (h1 is the most important)
- <p> - Paragraphs of text
- <a href="..."> - Links to other pages
- <img src="..." alt="..."> - Images
- <ul> / <ol> - Lists (unordered/ordered)
6) HTML Attributes
Attributes give extra information to elements.
<!DOCTYPE html>
<html>
<head>
  <title>HTML Attributes</title>
</head>
<body>
  <h1>HTML Attributes Demo</h1>

  <!-- Input with type and placeholder -->
  <input type="text" placeholder="Enter your name">
  <br><br>
  <input type="email" placeholder="Enter your email">
  <br><br>

  <!-- Link that opens in new tab -->
  <a href="https://example.com" target="_blank">
    Open in new tab
  </a>
  <br><br>

  <!-- Div with id and class -->
  <div id="main" class="container">
    <p>This div has an ID and a class.</p>
  </div>
</body>
</html>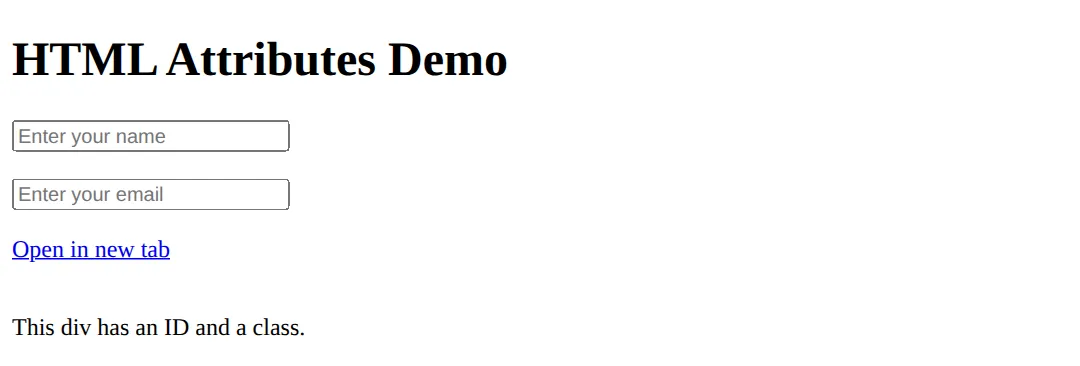
- type - input type
- placeholder - hint text
- href - link destination
- src - image source
- id - unique identifier
- class - CSS styling hook
You will use class and id heavily with CSS.
7) What Is CSS?
CSS stands for Cascading Style Sheets.
- 📱 Responsiveness
- ✨ Animations
HTML creates the content. CSS makes it look professional.
8) Basic CSS Example
<!DOCTYPE html>
<html>
<head>
  <title>CSS Demo</title>
  <style>
    body {
      background-color: #1a1a2e;
      color: white;
      font-family: Arial, sans-serif;
      padding: 20px;
    }

    h1 {
      color: #00d4ff;
    }

    p {
      font-size: 18px;
      line-height: 1.6;
    }
  </style>
</head>
<body>
  <h1>Styled with CSS!</h1>
  <p>This page has a dark background, white text, and a blue heading.</p>
  <p>Try changing the colors and see what happens!</p>
  <!-- ✅ Expected result, measured in a real browser:
     h1 -> color: rgb(0, 212, 255)
     p -> font-size: 18px
  -->
</body>
</html>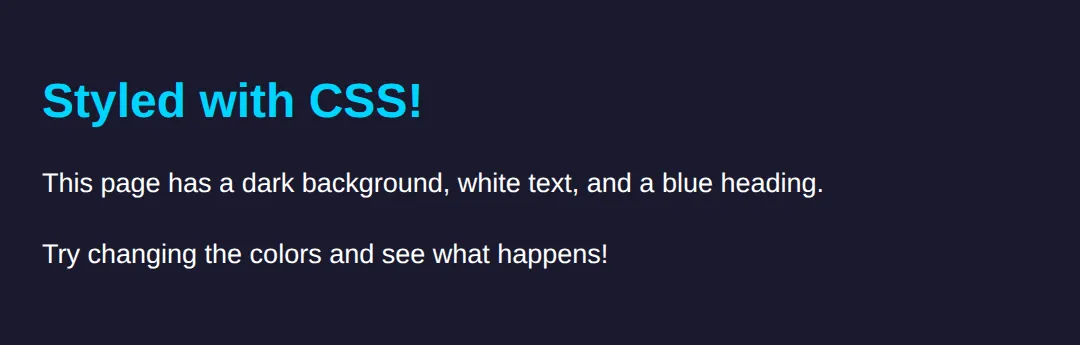
- ⬛ Dark background (#1a1a2e)
- ⬜ White text
- 💙 Blue heading (#00d4ff)
- 🔤 Arial font
9) How CSS Is Applied (3 Ways)
<!DOCTYPE html>
<html>
<head>
<title>CSS Methods</title>
<!-- 2. Internal CSS (in head) - Better -->
<style>
.internal-styled {
color: #22c55e;
font-weight: bold;
}
</style>
</head>
<body style="background: #0f172a; padding: 20px; font-family: sans-serif; color: white;">
<h1>Three Ways to Apply CSS</h1>
<!-- 1. Inline CSS - NOT recommended -->
<p style="color: #ef4444;">
1. Inline CSS (NOT recommended) - Hard to maintain
</p>
<!-- 2. Internal CSS - Better -->
<p class="internal-styled">
2. Internal CSS (Better) - In the <style> tag
</p>
<!-- 3. External CSS - BEST PRACTICE -->
<p style="color: #3b82f6;">
3. External CSS (BEST) - In a separate .css file
</p>
<p style="color: #9ca3af; margin-top: 20px;">
In real projects, always use external CSS files!
</p>
</body>
</html>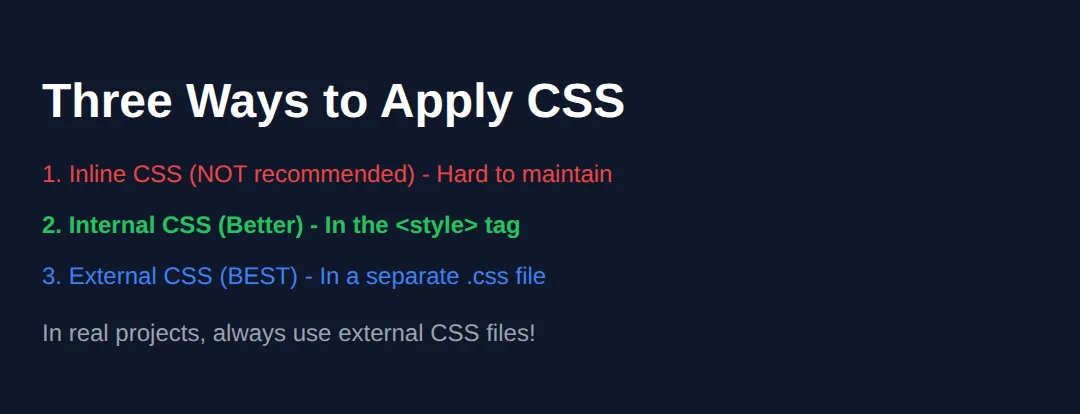
1. Inline (NOT recommended)
Bad for real projects — hard to maintain.
2. Internal CSS
Better, but still not ideal for larger projects.
3. External CSS (BEST PRACTICE ✅)
This is how real websites are built.
10) CSS Selectors (Very Important)
Selectors tell CSS what to style.
<!DOCTYPE html>
<html>
<head>
  <title>CSS Selectors</title>
  <style>
    body {
      background: #0f172a;
      color: white;
      font-family: sans-serif;
      padding: 20px;
    }

    /* Element selector - styles ALL p tags */
    p {
      color: #94a3b8;
    }

    /* Class selector - reusable */
    .highlight {
      background: #22c55e;
      color: #0f172a;
      padding: 8px 12px;
      border-radius: 4px;
    }

    /* ID selector - unique */
    #main-title {
      color: #3b82f6;
      font-size: 2rem;
    }
  </style>
</head>
<body>
  <h1 id="main-title">CSS Selectors Demo</h1>

  <p>This paragraph is styled by the element selector.</p>
  <p>So is this one!</p>

  <p class="highlight">This uses a class selector.</p>
  <p class="highlight">Classes are reusable!</p>
  <!-- ✅ Expected result, measured in a real browser:
     p -> color: rgb(148, 163, 184)
     .highlight -> padding-top: 8px
     .highlight -> count: 2
  -->
</body>
</html>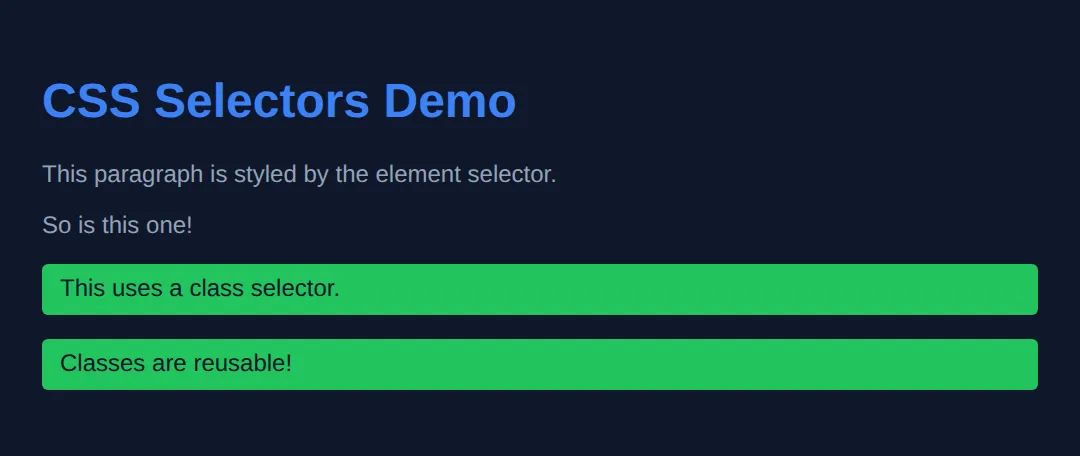
- Element: Styles all elements of that type
- Class (.name): Reusable, can apply to many elements
- ID (#name): Should be unique per page
11) The Box Model (Core Concept)
Every element is a box. The box has:
- 📦 Content – the actual text/image
- 🔲 Padding – space inside the border
- 🖼️ Border – the edge of the box
- ↔️ Margin – space outside the border
<!DOCTYPE html>
<html>
<head>
  <title>Box Model</title>
  <style>
    body {
      background: #0f172a;
      color: white;
      font-family: sans-serif;
      padding: 20px;
    }

    .box {
      background: #1e293b;
      padding: 20px;
      margin: 20px;
      border: 3px solid #3b82f6;
      border-radius: 8px;
    }

    .inner-box {
      background: #334155;
      padding: 15px;
      border: 2px dashed #22c55e;
    }
  </style>
</head>
<body>
  <h1>The Box Model</h1>

  <div class="box">
    <p><strong>Outer Box</strong></p>
    <p>• Blue border (3px)</p>
    <p>• Padding: 20px inside</p>
    <p>• Margin: 20px outside</p>

    <div class="inner-box">
      <p><strong>Inner Box</strong></p>
      <p>Nested inside with its own padding and border</p>
    </div>
  </div>
  <!-- ✅ Expected result, measured in a real browser:
     .box -> padding-top: 20px
     .inner-box -> padding-top: 15px
  -->
</body>
</html>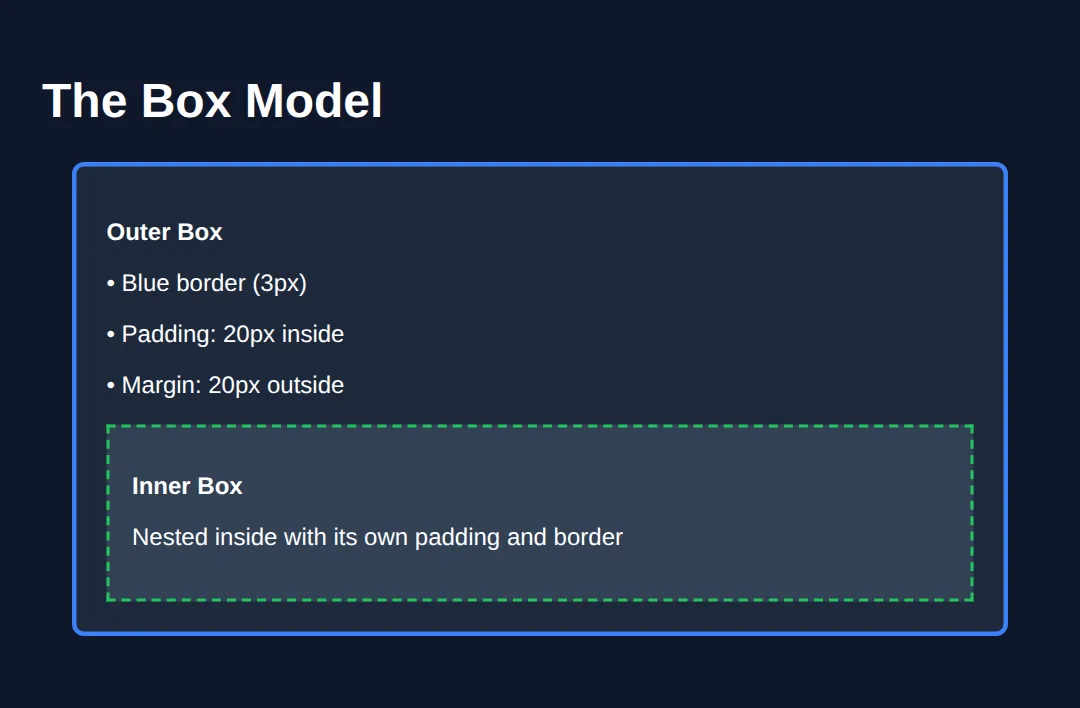
Understanding this is mandatory for layout.
Worked Example: One Small Page That Uses Everything So Far
You have now met the page skeleton, HTML elements, attributes, the three kinds of CSS selector, and the box model. Here they all are in one page, with a comment on every line that is doing something. Read it top to bottom, then run it and change one thing to see what moves.
<!DOCTYPE html>              <!-- "This is modern HTML5" -->
<html lang="en">             <!-- lang tells screen readers what language to speak -->
<head>
  <meta charset="UTF-8">     <!-- lets you use é, £, emoji and so on -->
  <title>My Profile Card</title>  <!-- shows in the browser tab, not on the page -->

  <style>
    /* ELEMENT selector: matches every <body> (there is only one). */
    body {
      background: #0f172a;
      color: #e5e7eb;
      font-family: system-ui, sans-serif;
      padding: 30px;         /* 30px of breathing room around everything */
    }

    /* ID selector: the # matches id="page-title". One element only. */
    #page-title {
      color: #3b82f6;        /* renders as rgb(59, 130, 246) - blue */
      font-size: 2rem;       /* 2 x the root 16px = 32px */
      margin-bottom: 4px;
    }

    /* ELEMENT selector: matches EVERY <p> on the page... */
    p {
      color: #94a3b8;        /* grey */
      line-height: 1.6;
    }

    /* CLASS selector: the . matches class="card". Reusable on any element. */
    .card {
      width: 320px;
      box-sizing: border-box;  /* keeps the card exactly 320px WITH padding+border */
      background: #1e293b;
      border: 2px solid #3b82f6;
      border-radius: 10px;
      padding: 20px;           /* space INSIDE the border */
      margin-top: 24px;        /* space OUTSIDE the border */
    }

    /* ...but this more specific rule wins for paragraphs inside .card,
       so they come out white instead of grey. Two selectors beat one. */
    .card p { color: #e5e7eb; margin: 0 0 12px; }

    .tag {
      display: inline-block;   /* sits on one line but still obeys padding */
      background: #22c55e;
      color: #052e16;
      font-size: 12px;
      font-weight: bold;
      padding: 4px 10px;       /* 4px top/bottom, 10px left/right */
      border-radius: 999px;    /* any huge number = a pill shape */
      margin-right: 6px;
    }

    a { color: #22c55e; }
  </style>
</head>
<body>
  <!-- id="page-title" is an ATTRIBUTE. It is what #page-title hooks onto. -->
  <h1 id="page-title">Sam's Page</h1>

  <p>Everything below is plain HTML with a little CSS.</p>

  <div class="card">
    <p>Hi, I'm Sam. I'm learning to build websites.</p>

    <span class="tag">HTML</span>
    <span class="tag">CSS</span>

    <!-- href is the attribute that makes a link actually go somewhere -->
    <p><a href="https://example.com">My favourite site</a></p>
  </div>
  <!-- ✅ Expected result, measured in a real browser:
     .card -> box-sizing: border-box
     .tag -> display: inline-block
     .card -> count: 1
  -->
</body>
</html>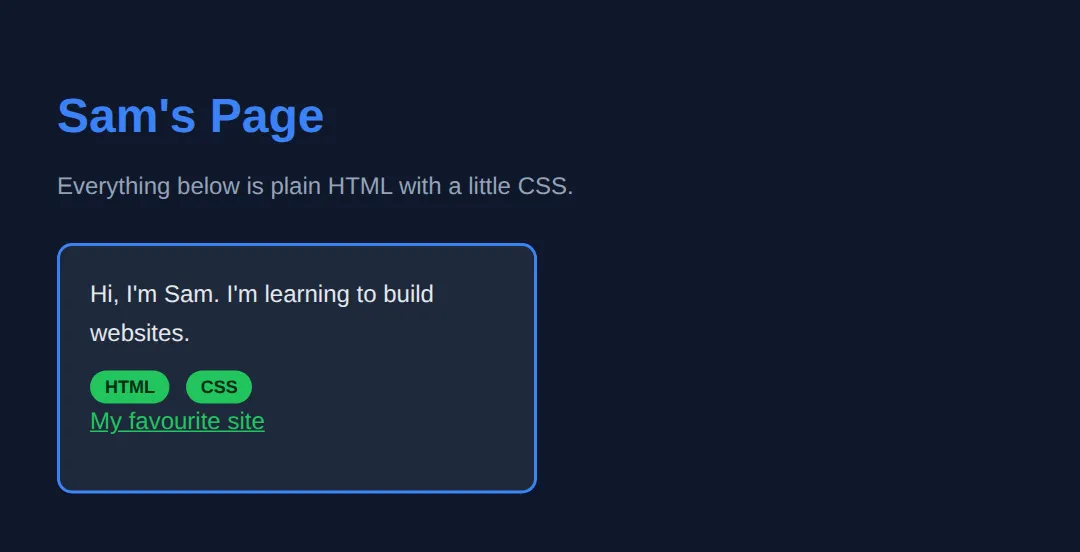
What you should see (these are the real measured values):
- A blue heading — rgb(59, 130, 246) at 32px.
- The loose paragraph under it is grey, rgb(148, 163, 184).
- The card is exactly 320px wide, with 20px of padding and a 2px border, leaving 276px for the text inside.
- The paragraphs inside the card are white, rgb(229, 231, 235) — the .card p rule beats the plain p rule.
- The two green pills sit side by side on one line.
🎯 Your Turn: Write Your First Three Selectors
Your turn to type something. The page below is complete except for three ___ gaps, and each gap is one of the three selector types you just met. Fill them in and run it.
<!DOCTYPE html>
<html lang="en">
<head>
  <meta charset="UTF-8">
  <title>About Me</title>
  <style>
    body {
      background: #0f172a;
      color: #e5e7eb;
      font-family: system-ui, sans-serif;
      padding: 30px;
    }

    /* 🎯 YOUR TURN — replace the three ___ with selectors. */

    /* 👉 1) Target EVERY paragraph on the page.
           An element selector is just the tag name, with no symbol. */
    ___ {
      color: #94a3b8;
    }

    /* 👉 2) Target the box below, which is marked class="card".
           A class selector starts with a dot. */
    ___ {
      width: 320px;
      box-sizing: border-box;
      background: #1e293b;
      border: 2px solid #3b82f6;
      border-radius: 10px;
      padding: 20px;
    }

    /* 👉 3) Target the single heading marked id="headline".
           An ID selector starts with a hash. */
    ___ {
      color: #22c55e;
    }

    /* ✅ Expected result, measured in Chrome:
       - The heading turns green, rgb(34, 197, 94).
       - The paragraph turns grey, rgb(148, 163, 184).
       - The box renders exactly 320px wide and 95px tall, with a blue
         2px border and 20px of padding inside it.
       - If nothing changes at all, your symbol is wrong: element = no
         symbol, class = a dot, id = a hash. */
  </style>
</head>
<body>
  <h1 id="headline">About Me</h1>

  <div class="card">
    <p>Hi! I'm learning HTML and CSS.</p>
  </div>
</body>
</html>
p { ... } /* 1 - element selector */
.card { ... } /* 2 - class selector, note the dot */
#headline{ ... } /* 3 - ID selector, note the hash */🏆 Mini-Challenge: Your Own "About Me" Page
No blanks this time. Below is a page skeleton and a list of what to build — you write every rule yourself. It should take about ten minutes, and it is the first thing you have made from scratch.
<!DOCTYPE html>
<html lang="en">
<head>
  <meta charset="UTF-8">
  <title>About Me</title>
  <style>
    /* 🎯 MINI-CHALLENGE — write the rules yourself. No answers below.

       1. body       -> a background colour you like, a readable text colour,
                        font-family: system-ui, sans-serif, and 30px of padding

       2. #name      -> style the h1: pick a colour and a font-size

       3. .bio       -> make the paragraph box look like a card:
                        a background, a 1px or 2px border, border-radius,
                        padding of 20px, max-width: 420px,
                        and box-sizing: border-box

       4. .skill     -> turn each skill into a pill:
                        display: inline-block, some padding,
                        border-radius: 999px, a background colour

       5. a          -> give links a colour that stands out from the text

       ✅ Check yourself:
          - Every one of the five rules above should use a DIFFERENT kind of
            selector or a different element. If you wrote five class
            selectors, look again at #name.
          - Change the .bio padding from 20px to 40px. The card should get
            taller (95px to 135px) but stay exactly 420px wide - that is
            box-sizing: border-box doing its job. If it balloons out to
            504px wide instead, that line is missing.
    */
  </style>
</head>
<body>
  <h1 id="name">Your Name</h1>

  <div class="bio">
    <p>Write two sentences about yourself here.</p>
  </div>

  <p>
    <span class="skill">HTML</span>
    <span class="skill">CSS</span>
    <span class="skill">Curiosity</span>
  </p>

  <p><a href="https://example.com">A site I like</a></p>
</body>
</html>
12) What You'll Learn in This Course
- ✓ Complete HTML elements and attributes
- ✓ CSS styling, colors, fonts, and spacing
- ✓ Layouts using Flexbox and CSS Grid
- ✓ Responsive design for all screen sizes
- ✓ Animations and transitions
- ✓ Best practices used by professionals
Key Takeaways
- ✓ HTML provides structure (the skeleton)
- ✓ CSS provides style (the appearance)
- ✓ Every HTML page needs: DOCTYPE, html, head, body
- ✓ CSS uses selectors to target elements
- ✓ The Box Model controls spacing (padding, margin, border)
Practice quiz
What does HTML stand for and what is its job?
- HyperText Markup Language — it describes a page’s structure and content
- HighText Machine Language — it runs logic
- HyperTool Markup Language — it styles a page
- HomeText Markup Language — it stores data
Answer: HyperText Markup Language — it describes a page’s structure and content. HTML is HyperText Markup Language; its job is to describe the structure and content of a page, not to do logic or styling.
What does CSS stand for?
- Computer Style Sheets
- Cascading Style Sheets
- Creative Styling System
- Colorful Style Syntax
Answer: Cascading Style Sheets. CSS is Cascading Style Sheets; it controls how content looks — colors, fonts, spacing, and layout.
Which declaration must begin every modern HTML5 document?
- <html5>
- <!DOCTYPE html>
- <doctype html5>
- <meta html>
Answer: <!DOCTYPE html>. <!DOCTYPE html> tells the browser to treat the document as modern HTML5.
Which two top-level tags sit inside <html> in a basic page?
- <header> and <footer>
- <title> and <meta>
- <head> and <body>
- <style> and <script>
Answer: <head> and <body>. <head> holds non-visible info like the title and meta, while <body> holds the visible content.
Which is the most important (top-level) heading element?
- <h6>
- <head>
- <h1>
- <title>
Answer: <h1>. Headings run from <h1> (most important) down to <h6>; <h1> is the main heading.
Which attribute holds a link's destination on an <a> element?
- src
- link
- href
- to
Answer: href. The href attribute on <a> specifies where the link goes; src is for embedded resources like images.
Which CSS selector targets elements by a reusable class name?
- #name
- .name
- name
- *name
Answer: .name. A leading dot (.name) is a class selector and can apply to many elements; # is for a unique id.
Which selector targets a single unique element by its id?
- .main
- #main
- main
- @main
Answer: #main. A leading # (#main) is an id selector, and an id should be unique on the page.
Which approach is considered best practice for applying CSS in real projects?
- Inline styles on every element
- Internal <style> in the head
- External CSS in a separate .css file
- A mix of inline styles only
Answer: External CSS in a separate .css file. External stylesheets keep CSS separate and reusable, which is how real websites are built.
In the CSS box model, which layer is the space OUTSIDE the border?
- Content
- Padding
- Border
- Margin
Answer: Margin. From inside out: content, padding, border, margin. Margin is the space outside the border that pushes other elements away.
Continue this course
- Next: HTML Basics & Structure — Write your first HTML page — headings, paragraphs, and page structure
- Quick reference: HTML & CSS cheat sheet